Back to TheWorxHub for Senior Living Main Menu
PO/Inventory Settings
The PO/Inventory Settings allow you set up your tax information, customize PO numbers, as well as set your shipping and billing addresses. Before making changes to these settings, make sure you have created your inventory pick lists under settings. Inventory pick lists include: Inventory Category, Inventory Sub-Category, Inventory UOM, GL Code, and Bin/Shelf. If you do not currently have the PO/Inventory application, please contact your Sales Representative or Client Services form more information. *Note: If you do not currently have the PO/Inventory application, please contact your Sales Representative or Client Services for more information.
To access the PO/Inventory settings in TheWorxHub:
- Click on Settings from the navigation menu, then select the PO/Inventory tab. *Note: In order to access PO/Inventory Settings, your user role must have the box for Add & Search POs and Inventory checked.
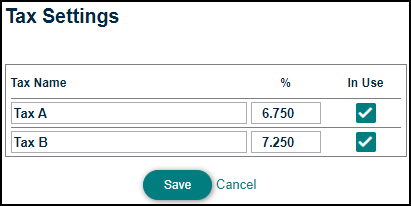
Tax Settings
TheWorxHub allows you to apply two separate taxes to purchase orders.
- By Default the two taxes are called Tax A and Tax B, but you can rename them by clicking in the Tax Name field.
- Enter the Percentage for the tax and check the In Use box if you would like this tax applied on purchase orders.
- Click Save.
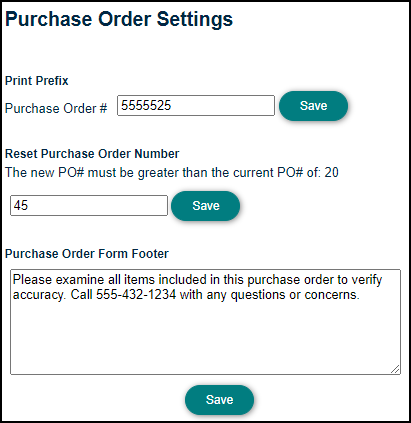
Purchase Order Settings
- Enter a Print Prefix to append a specific number in front of the purchase order number, and click Save.
- If you need to Reset the Purchase Order Numbers, enter a number greater than the current PO# displayed on this page and click Save.
- Enter a Purchase Order Form Footer if you need to display footer text at the bottom of the purchase order. *Note: There is a character limit of 250.
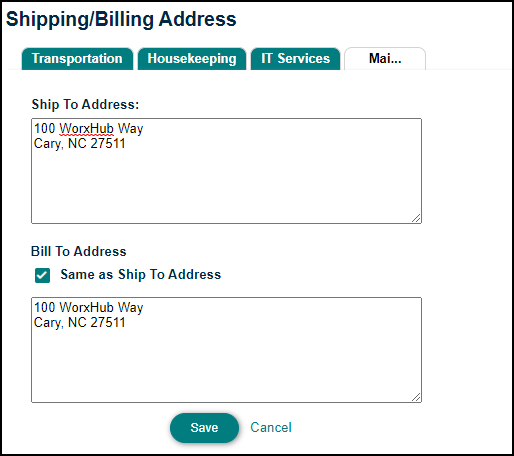
Shipping/Billing Addresses
- Click on the application in the Shipping/Billing Address section.
- Enter the Ship To Address.
- If the Bill To Address is the same as the Ship To Address, check the box next to Same as Ship To Address. If the Bill To and Ship To Addresses are different, enter the Bill To Address.
- Click Save to save the addresses for this application. Repeat this process for any other applications in your WorxHub account.